


Afterpay is available for ShopFactory merchants with a store address in Australia.
Note: Afterpay is only available to ShopFactory users with active SF Cloud subscription.
You can show your customers the Afterpay installments on Product pages and on the Basket page with the Afterpay lightbox that links to Afterpay’s terms and conditions.
Payment Configuration
To enable and display Afterpay as a Payment Method, follow the steps below:
1. Click Central dropdown > Payment Methods Accepted
2. From the list of Payment Providers, tick "Afterpay" then click Next
3. Locate the Afterpay setup dialog and enter the Merchant ID provided by Afterpay into the Merchant ID field.
The Merchant ID is a number. If you don't have this please contact your Afterpay Account Manager.
4. Enter the Secret Key provided by Afterpay into the Secret Key field.
If your Afterpay merchant account is on Test mode, tick the ‘Test (Sandbox)’ checkbox.
5. Enable all the supported currencies for Afterpay i.e. AUD and then tick "Afterpay" payment method.

6. Scroll down and click Next.
7. You can sort the order of display for all the payment methods you want to accept in your shop. Click Finish.
8. Save and publish your shop online.
Enable Afterpay Site Messaging to my product and cart pages
Follow the steps below to enable the Afterpay Product Page assets on your ShopFactory website.
1: Check that the Afterpay app has been activated in your ShopFactory "My Apps" page
2: Open your shop project in ShopFactory editor > select ShopFactory Central page from the left-tree menu
3: Click "Activate Apps" button

4: Click 'My Store' > select “Afterpay” on the left menu
5: Tick the 2 checkboxes: Show Afterpay product elements and Show Afterpay basket page elements
6: From the Badge Theme dropdown, select the Afterpay logo to match your website theme i.e. mint on black, black on white, etc.
![]()
7: Click 'Close' and save shop.
Optional: Click Settings menu > tick 'Rebuild All' > Preview your website in your default browser
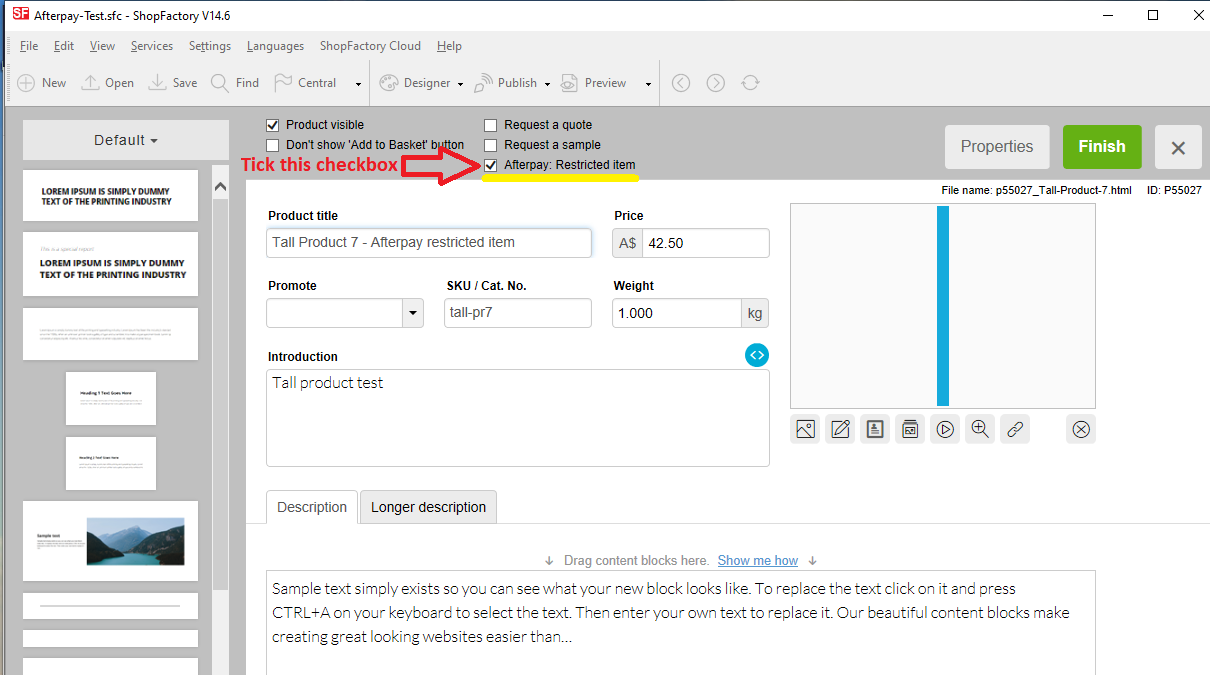
Afterpay Restricted Items
Merchants may sell a mixture of restricted and unrestricted goods. Merchant can select / restrict specific items from being used with the Afterpay payment method. This can be achieved by following the steps provided below:
8: From the left-tree menu, select the category where a 'restricted' item is contained then switch to "Manage Products"
9: Select the product and click Edit Product
10: Tick 'Afterpay: Restricted Item' chekbox and click Finish
11: Save and Preview your website in external browser
12: Go back to the ShopFactory editor and publish your shop so the changes are uploaded online.
 English
 Français
 Deutsch